This topic is a quick overview of how to set up the LS Hardware Station. The screen captures are from LS Nav version 10.04 and do not relate to previous versions.
Prerequisites
Currently, only the LS Nav Web POS client supports the LS Hardware Station. Therefore, LS Nav and Toolbox must be installed before you attempt using LS Hardware Station.
At this time, supported devices are cash drawer, scanner, line display, printer, and EFT.
Installing the LS Hardware Station
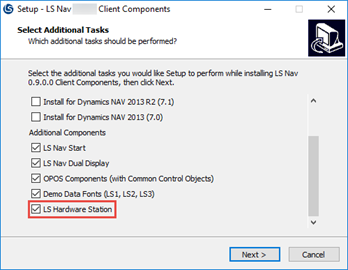
The LS Hardware Station is installed through the LS Nav Client Components installer. If a previous version of the client components is already installed, that version may have to be uninstalled first. Make sure to select the LS Hardware Station check box during the installation (see image below).

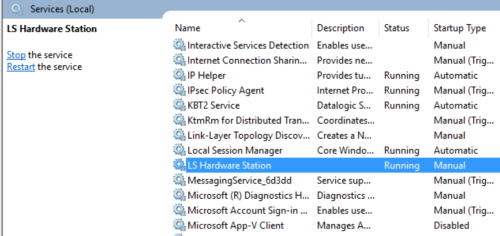
The LS Hardware Station service must be started manually after installation.

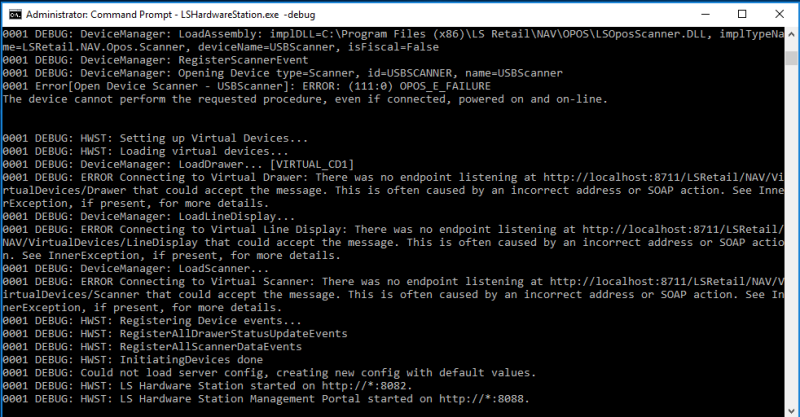
Note: LS Hardware Station can also be run as a console application by running "C:\Program Files (x86)\LS Retail\HardwareStation\LSHardwareStation.exe" with the parameter "-debug".

Management Portal (optional)
Use the LS Hardware Station Management Portal to change any parameters (config) of devices installed on the machine that hosts the Hardware Station. In some cases, none of these parameters need to be changed. If so, skip this step.
-
To access the Management Portal (after installing the client components), navigate to localhost:8088 in your preferred browser. If you are accessing the Management Portal from a computer other than the one that LS Hardware Station is installed on, exchange localhost for the correct host name. Also note that the Management Portal port can be changed, but the default value is 8088.
-
The landing page will prompt for a host name and port. Leave these text boxes with their default values unless the port or host name settings were changed or if you are accessing an LS Hardware Station on a different machine. Note: The default port for the LS Hardware Station service is 8082, while the Management Portal is on 8088 by default.
Note: After restarting LS Hardware Station, you must refresh the Management Portal page in order to establish a new connection.
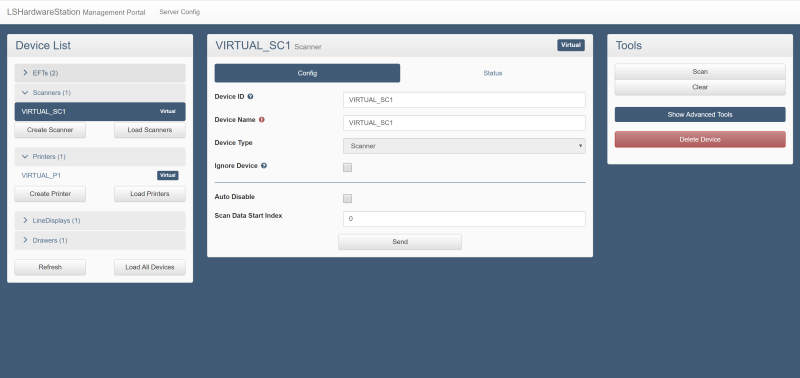
When you open the Management Portal and select a device from the list for the first time, the screen should look something like the image below.

Loading OPOS devices in Management Portal
No installed OPOS devices are loaded when the Hardware Station is first started.
- To load all installed OPOS devices, click the Load All Devicesbutton.
-
To load specific devices, select the Load button at the bottom of the desired device type list. A pop-up window will appear where devices can be selected and subsequently loaded.
Note: After a device has been loaded, it will always be loaded when the Hardware Station is restarted, unless the device is deleted using the Delete Device button, or if the Ignore Device flag is set.
Tip:To automatically load all OPOS devices on startup of the Hardware Station, run
"C:\Program Files (x86)\LS Retail\HardwareStation\LSHardwareStation.exe" with "-autoLoadDevices" as the second parameter.
Tip: New devices cannot be installed through the Management Portal. Hardware Station attempts to discover them, and allows the user to configure them using the portal.
Note: In addition to letting you configure devices, LS Hardware Station also lets you perform some basic operations, such as opening a drawer or displaying a message on a line display.
Windows printer setup in Management Portal
To set up a Windows Printer to use with the Hardware Station, click the Create Printer button at the bottom of the printer list. A pop-up window will show a list of available Windows printers where you can select and load the desired printer .
Hardware profile settings
To enable LS Hardware Station in the Web POS, the Hardware Station is synced to a Hardware Profile:
- Navigate to the Hardware Profiles page in LS Nav.
- Select a profile from the list, or create a new one.
-
On the LS Hardware Station FastTab, select the Sync with LS Hardware Station check box , and insert the correct URL in the Hardware Station Host field. The LS Management Portal field contains a link to the Management Portal for quick access. The link is automatically updated when the Hardware Station host is inserted.

Note: If you do not specify a port for Hardware Station, either at the end of the host name or in the Hardware Station Port field, the default port 8082 is used. The same applies to the Management Portal link which defaults to port 8088.
-
Click Detect Hardware on the Home action bar and all available devices are added to the hardware profile. They will appear at the bottom of the page, each in its relevant FastTab. You are asked if you want to overwrite a device that either already exists or is already in the hardware profile.

Note: You can edit the device FastTabs manually, if you want. But be aware that adding devices manually does not guarantee that they are loaded into the Hardware Station.
If everything went as expected in the previous steps, a banner is displayed when the Web POS is run, indicating that the connection was successful:

Important: If the connection was unsuccessful, make sure that the port, which is used by the Hardware Station (8082 by default), is open on the Hardware Station's firewall.
Using virtual devices with Web POS
To enable virtual devices in LS Hardware Station, select the Load Virtual Station check box in the Server Config section, and click Send.
Virtual Station for the Web POS is run separately from the LS Hardware Station service. By default it is located here: C:\Program Files (x86)\LS Retail\HardwareStation\VirtualStation\LSRetail.NAV.Opos.LSVirtualDevicesHost.exe and needs to be run as administrator. After starting the Virtual station, the LS Hardware Station Service must be restarted.
Note: In order to use virtual devices, the Hardware Profile in use has to be configured to use the virtual devices available in the Management Portal (Printer; VIRTUAL_P1, Drawer; VIRTUAL_CD, Line Display; VIRTUAL_LD1, Scanner; VIRTUAL_SC1). There is a demo hardware profile for this in the demo data named #HARDWSTAT.
See Also
Known Issues in LS Hardware Station